Resurrected Projects

Trains

Last week I was invited to to an operating session at my friend Mike’s and while operating a job at one part of the section I got to thinking this would be a good area to have a dedicated industry switcher. This part of the layout is the second level so with a pretty good grade to get to it so you generally need two engines but once up the hill you a long consist is a hindrance.

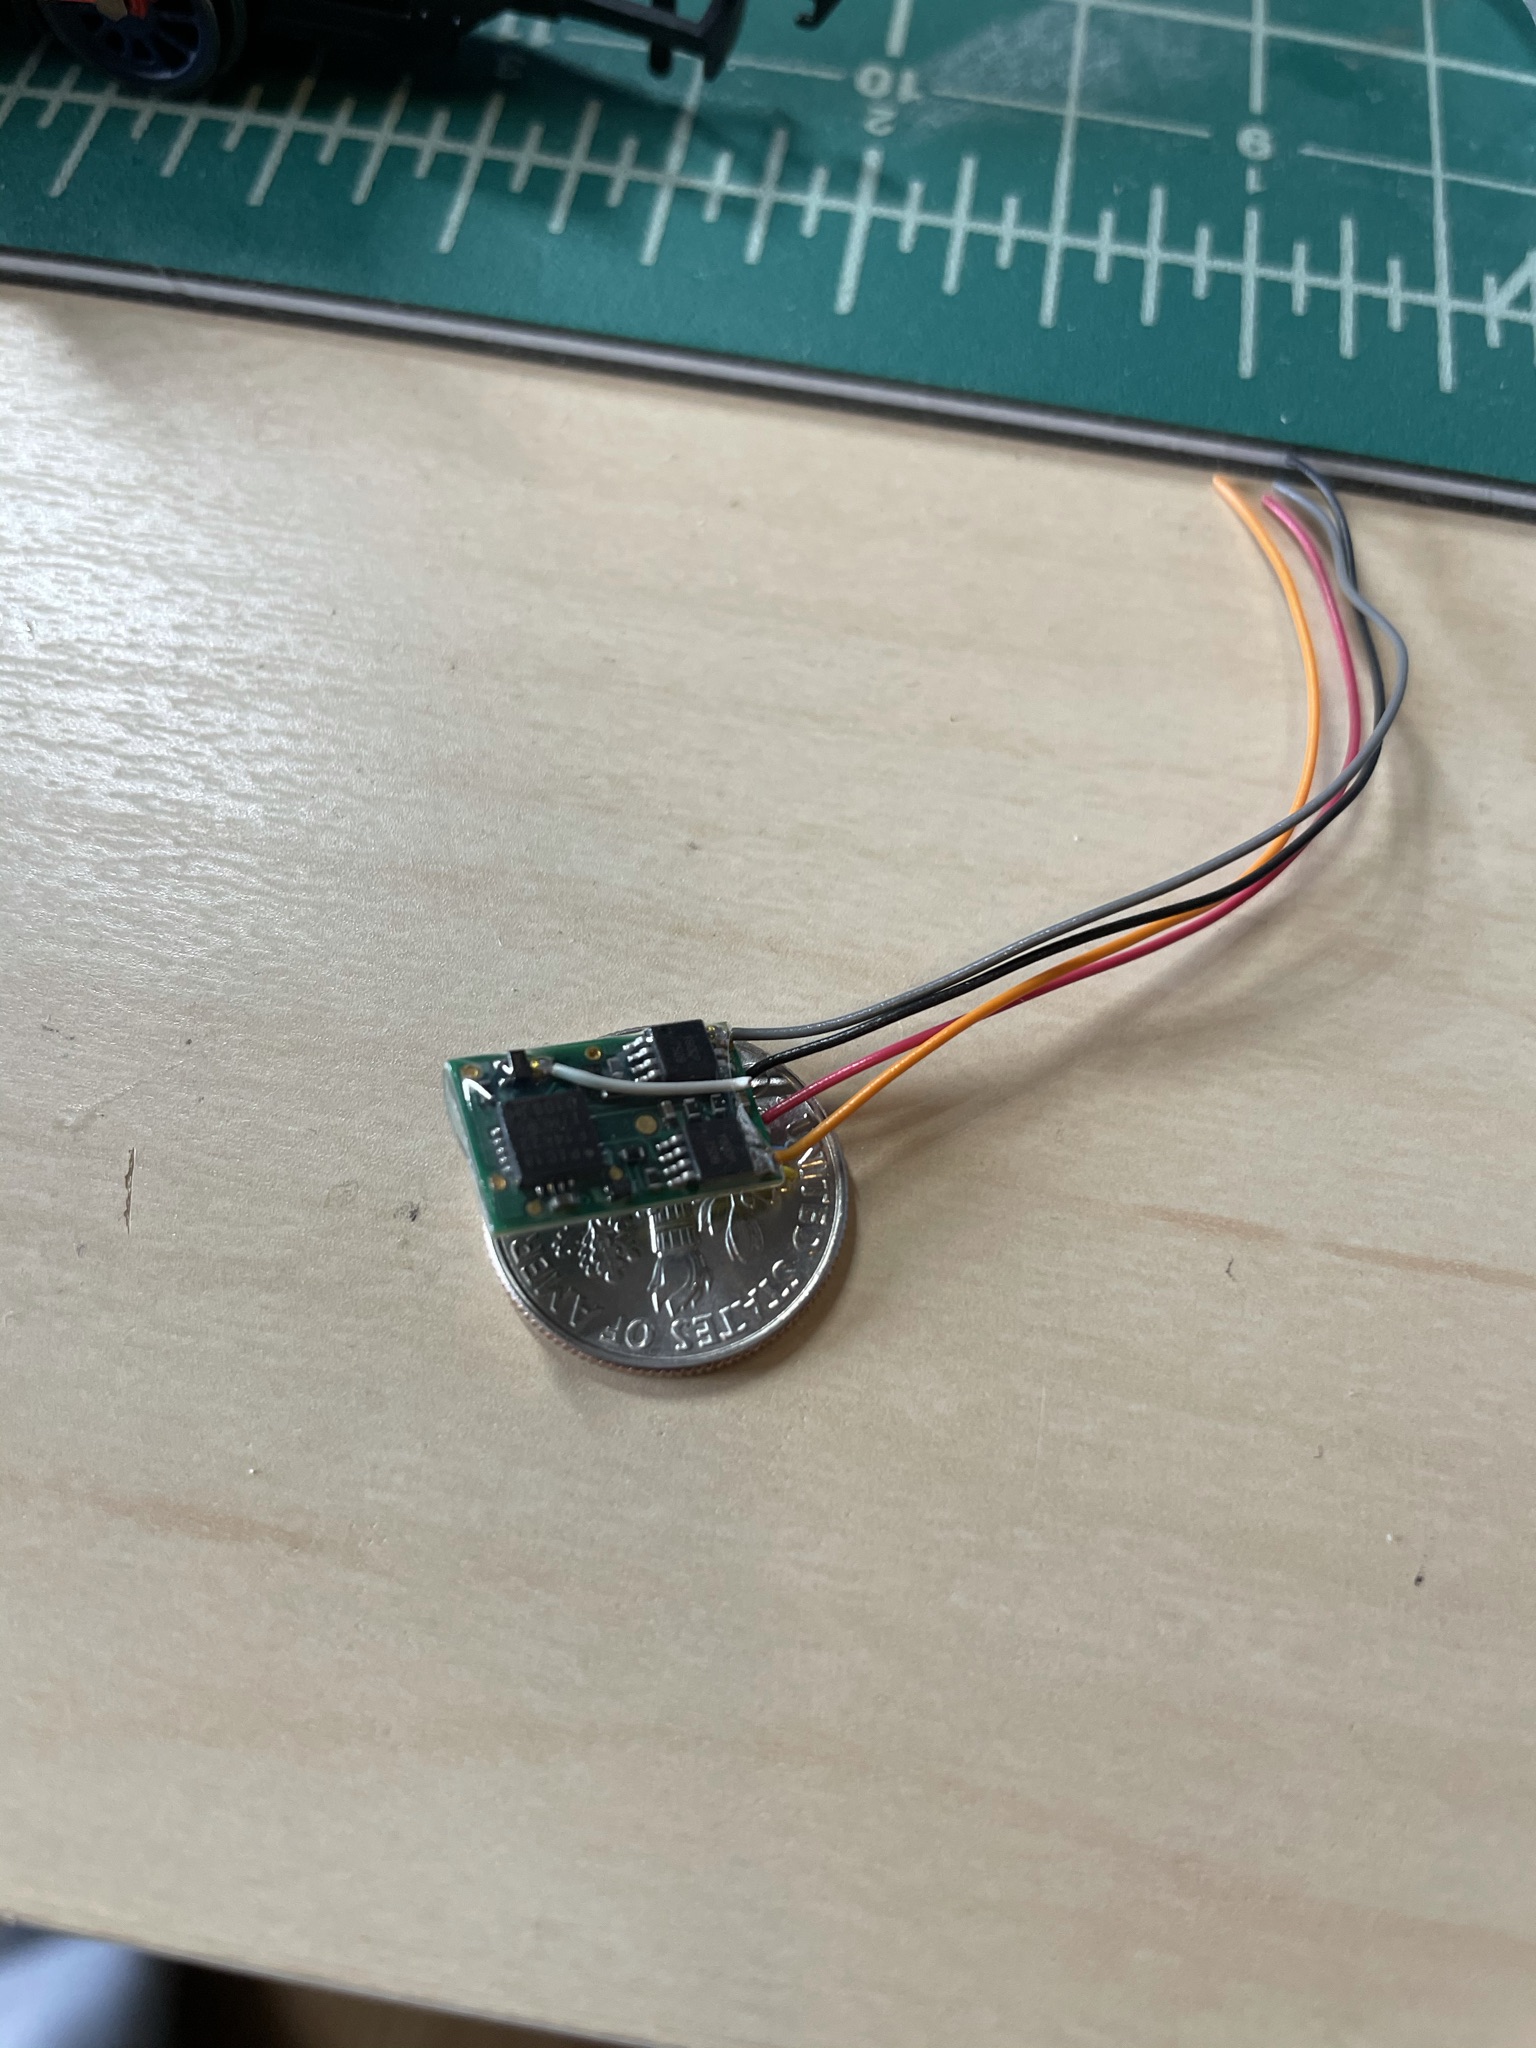
I was also thinking “hey, I think I’ve got a switcher that’s currently sitting in a box I should dig that out for future ops sessions”. And I was pretty sure it had a decoder installed as well because I found some really tiny decoders. Well it turns out I have two SW1s (And I think at least one SW1500 but that’s another story) but this was how I found them:
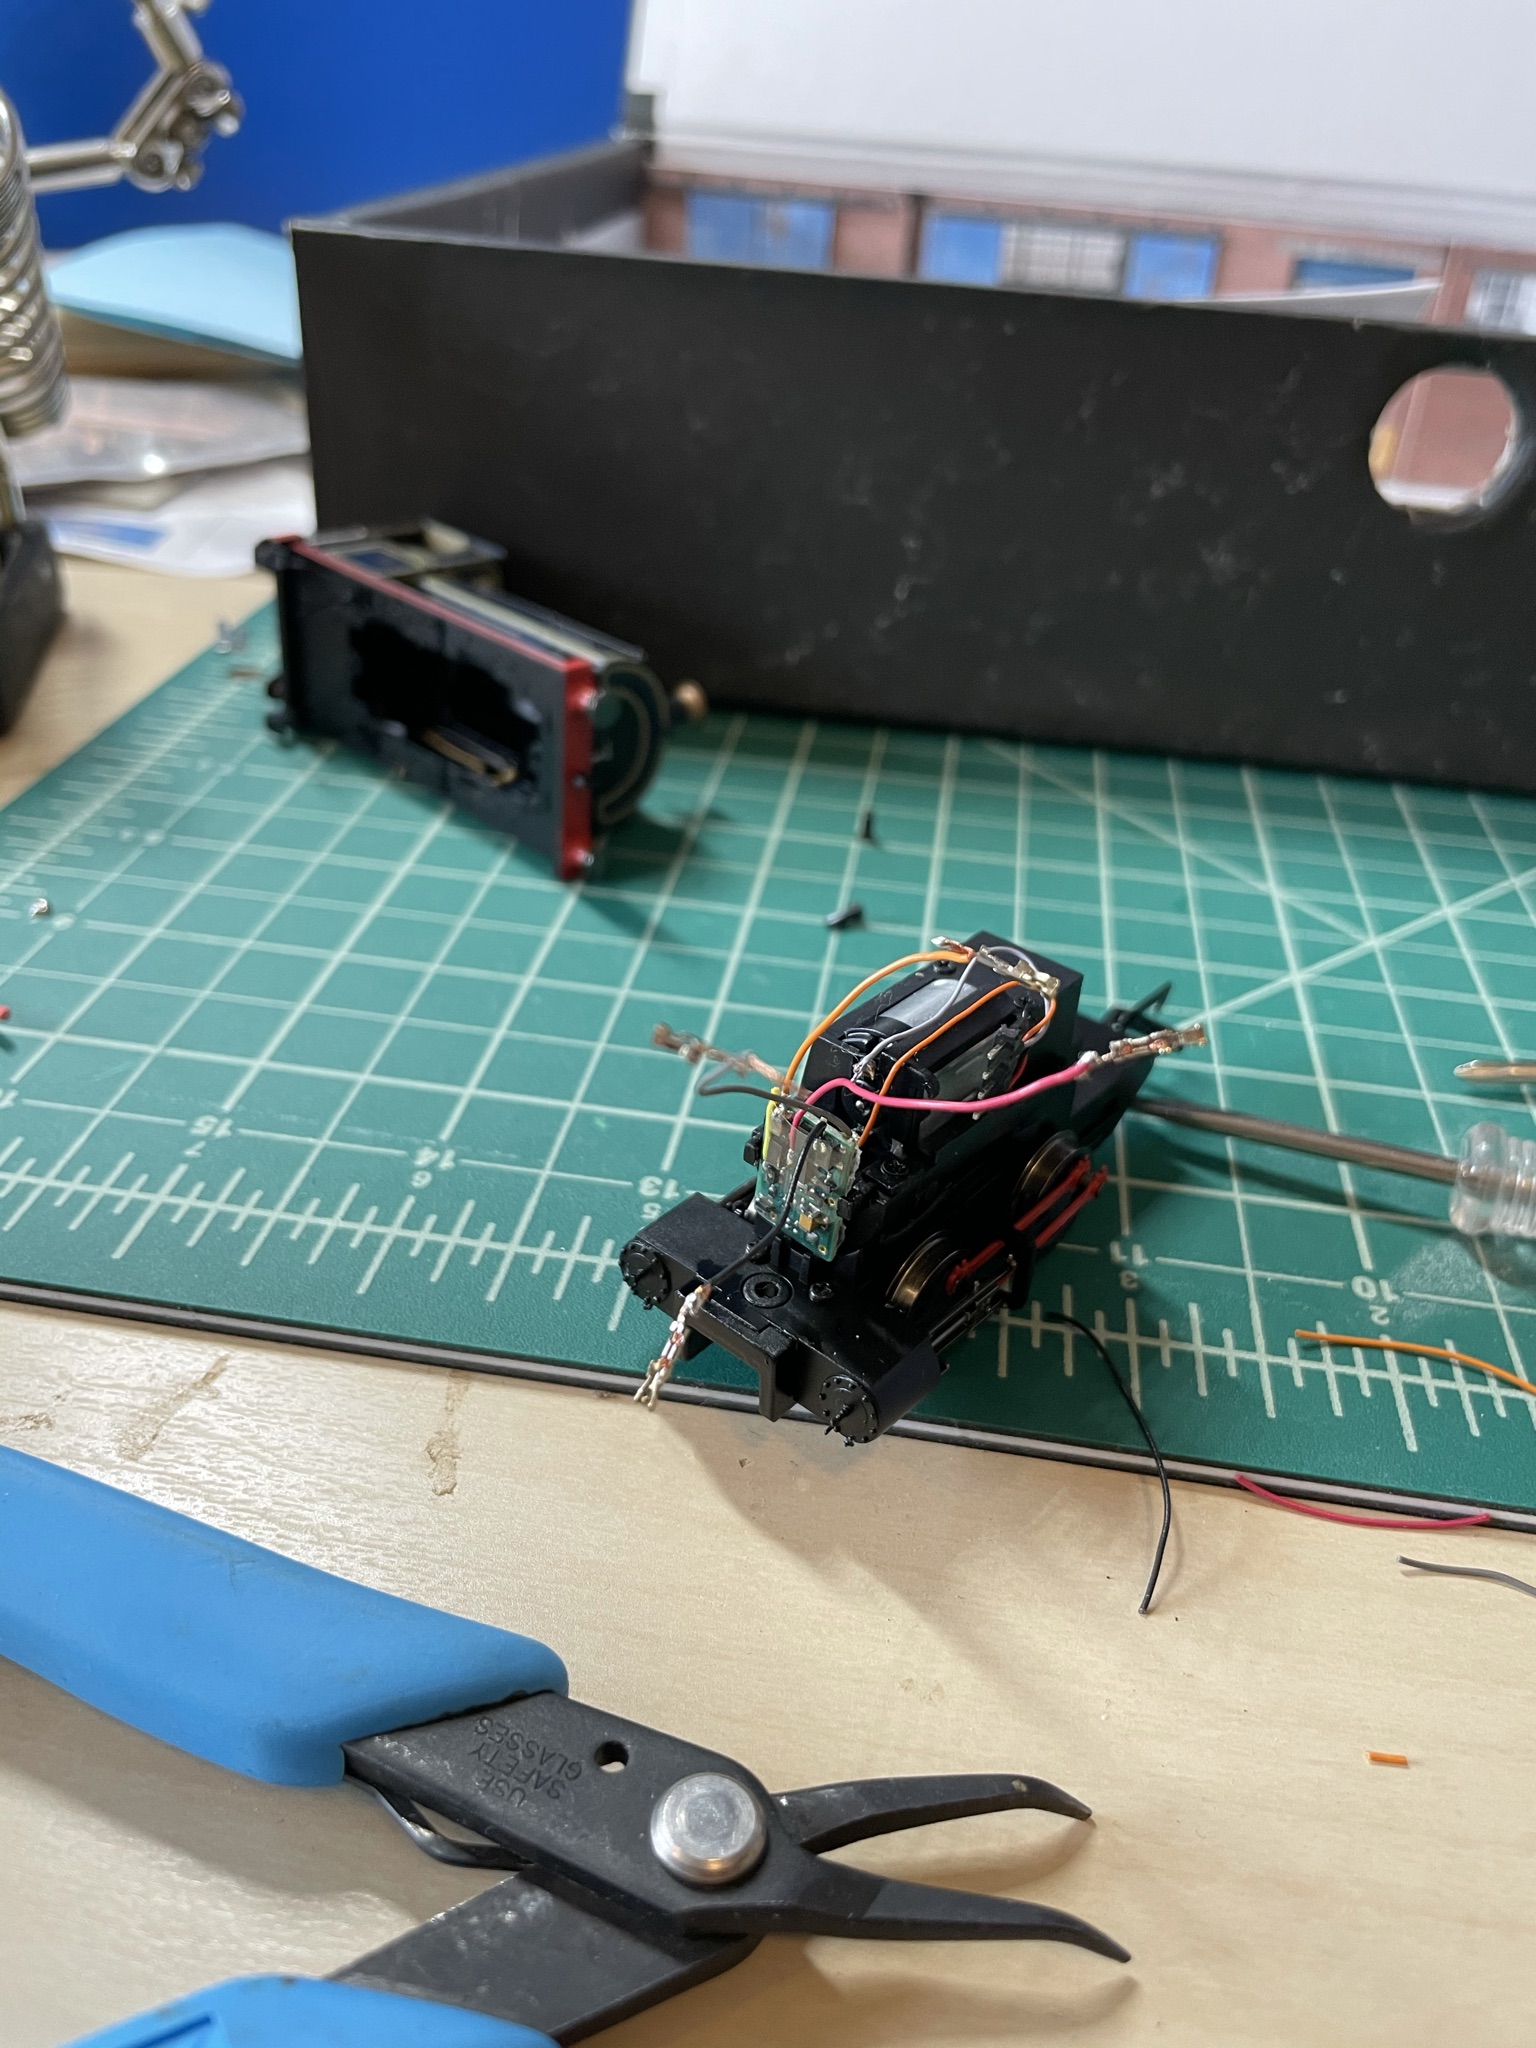
Oh dear.

Well it turns out I’d converted one to DCC and found a significantly smaller decoder for the second one. But why were both disassembled? Well according to my blog the first one had a broken drive shaft (evidently common on this particular version of the SW1) and I had fixed it and then DCC converted it. I switched to the DZ126 decoder for the second because it was so much smaller and worked really well so I started converting the second one to the same decoder. So one was apart because it was mid-DCC install. But why was the other one apart? Well it turns out it now has the same fault the original did. Fortunately I have leftover parts from the first one to fix the second.

In my searching of boxes I also found I have some decals to letter Soo 320 (the black one) so maybe I’ll finally finish it.

Motive Power on the box file layout

Uncategorized

I had previously mentioned my attempts to order a Peckett from Hornby US with no success. Technically I guess I still have one on pre-order, who knows if anything will come of it. In the mean time I found one on an internet auction site so now I have this:

The cement hopper is provided for size reference, as it’s one of the smaller cars you’d find on an US themed modern layout. That is to say a Peckett is small, though very highly detailed. I was surprised how intricate the details are and even more surprised with how heavy it is.

It should come as no surprise a decoder for this little thing is even smaller. This isn’t the official Hornby decoder, it’s a TCS M1 which is actually smaller. The reason I went with it is because it’s much easier to get ahold of. Surprisingly this was probably one of the easiest decoder installs other than the drop in type. This is likely because there is no lighting to worry about.

I took a video of it on a test run under DCC power… unfortunately I didn’t have a lot of track to test it on but what I did it was working like a champ.

Getting Some Track Down Part 3

Trains

The very observant on my last post may have noticed a problem in my track work.

It’s not easy to spot, but I’ve introduced a short in two of the sidings, though not at the same time. Basically whatever route is not selected has a dead short between the rails. In theory the way I intend to operate this that shouldn’t be a problem but I’d rather not wait for it to be a problem when it’s finished (I know it’s optimistic for me to use the word done on this project).

Way back in the before Covid times (well at least in the US) February 2020 I pre-ordered a Hornby Peckett. I think I first saw the Peckett on the OTCM blog and knew I had to get one at some point… that was a few years ago. When I started this boxfile project I also knew I wanted to use a Peckett to operate it but I never got around to actually trying to track one down. Through Hornby USA I pre-ordered one (Port of London Authority) that was at the time marked Winter 2020 delivery (to be fair it’s still marked as Winter 2020 delivery) but the weird thing is I can’t get any response from their customer support so I kind of wonder if they are still operating or if the US arm has shut down. It looks as though I will have to look elsewhere for motive power.

Getting Some Track Down Part 2

Trains

It’s kind of hard to believe this is a sub-project I started February 29th 2020. Of course I could use the chaos that is 2020 as an excuse for taking a break from the hobby… and I might still do that, we’ll see where this train of thought takes me. The downfall probably more goes back to 2017ish when I changed jobs which made me a lot busier, then at the end of 2018 the room that was my home office and train room became a bedroom and my new office didn’t have the space for my existing layout and not really space for any layout. Then in 2019 I started this boxfile layout… which is fun but I’ve not been very good at making progress.

When last I blogged about this project, 11 months ago, I’d worked out where I needed to fasten down the track and where I needed to tunnel in a way to actuate the switch from the front. I got some small brass tubing that I could run piano wire for the actuation, and that was super back ordered and that’s why it’s been 11 months… or it arrived two days later and I just never got around to it. With that in place it was only a matter of fastening the track in place.

My plan for wiring is to run it inside the building in the upper right corner and have a plug to the outside world on the side or back to power it up.

Friday Night Ops

Trains

Last night I was fortunate enough to attend an operating session at my friend Mike’s. I took along my ScaleTrains EMD Leasing SD40-2 (Ex MILW Bandit) along to run. Now the history of this locomotive is it arrived broken (just an minor issue) just before I had to tear down my shelf layout. So all I’d done to it is get a decoder in it and program it’s address before it spent over a year in the box never having a shake down. Of course the first switch it ran over it derailed but after that it ran flawlessly.

Thanks again Mike for having me over to operate your wonderful layout!

Getting Some Track Down

Trains

The first part of Structure A is almost complete and one of the next steps is gluing it in location so it was time to start putting in some track. I had been stalling on this a little because this could be a harder thing to fix if I find it’s lacking once the whole project is done.

The lower track isn’t in it’s final position, it’s just clamped at one at to hold it in place long enough for a picture.

Putting Up Walls

Trains

One of the things I’ve struggled with this Scalescenes kit is building up the thickness needed. For Clever Models I’ve done you print directly on card stock paper and then cut, fold, and assemble but the Scalescenes you print it on regular paper and glue it to different thickness stock based on what the part is needed for. I had trouble finding card stock as thick as the instructions called for, up to 2 mm. I’m not sure what the creators intended but I finally found something called chipboard that I could get in those types of thicknesses (maybe it’s this but just goes by a different name in the States). I’d describe it as the cardboard type product used for stiffening up envelopes or the backing of a picture frame.

The other problem I ran into is gluing it to other stock a sheet would seem well glued until I started cutting out parts and then I’d find gaps where it didn’t glue and it was generally a mess. Then I realized I had some super thin double sided tape, not the super common double sided tape in the US that’s like a memory foam mattress that’s sticky on both sides but the stuff that’s as thin or thinner than scotch tape. With that I can make sure the whole surface or the parts I need are well covered in sticky and they stay stuck.

With those tricks figured out I’m making good progress on the structures. I’m going to wait to finalize the track positioning until I can get structures assembled so I can verify I won’t have clearance problems.

Another final note on the chipboard, it’s pretty cheap and a fairly good building material. Sure it’s not as rigid as polystyrene but it’s a heck of a lot cheaper and easier to work with. I’d never really heard of it as a modeling material before, but I’ll have to file this in tricks to remember for future projects

Laying Rails

Trains

You may be thinking, “Hey Matt, you are almost finished with your 3-plank wagon, while are you working on something else? Just get it done!” To that I say, I have a reputation of not getting modeling projects done that I have to uphold…

Since I’d started this boxfile project over a year ago I’d kind of forgotten what I’d gotten for supplies. This corked ended up being adhesive backed which was nice and meant I didn’t have to clue it down myself. I’m not sure if I realized when I bought it but ended up working nice for this project!

Being used to American prototypes this switch is hilariously small

I think this is about where I’m thinking I’ll put the track, I think when I first decided to do this I was going to do a pivoting sector plate but I’m not sure I’ve go the skill to pull it off right now so I’m going to leave the track leaving parallel and figure out what I’m going to do later. Either a traverser or some more track and another turnout. I’m looking forward to getting the track done so I can start assembling buildings, I have a feeling things will start speeding up once the track is set and then I’ll have to start finding a proper locomotive and some more wagons.