Train Night

Trains

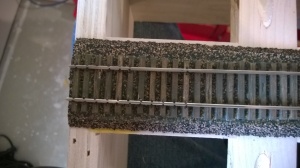
My friend Troy hosted a train night last night and a large part of it was a demonstration night, I demonstrated building a switch with the fast tracks jig (more on that in a bit). Bruce built a curved turnout without a jig (old-fashioned way), and Mike demonstrated his technique for ballasting. I offered up my river module as a demonstration piece of track which means it’s basically finished in terms of what I intended to do.

WP_20150502_15_33_45_Pro

The problem of course with it being finished is that means there is nothing left to do and I’m thinking about what additional details I could add but nothing considerable as I need to focus on getting my free-mo module done since I’m already scheming the next project. I have some HO scale cows that just might find themselves some grazing land in the meantime.

Bruce’s demonstration of building a switch was particularly interesting to me in how simple it really is to layout a switch in place and I’ll definitely be trying it myself when I get a chance. He also had some good tips that I’ll try on my next switch.

For my demonstration I made sure I had everything ready, all the parts ready for assembly and to save time a half assembled switch along with a toolbox full of tools to demonstrate each step and to finish the switch. Unfortunately I forgot the box of parts at home and fortunately Troy had some extra rail handy and I could finish it.

Water result

Trains

As I mentioned Tuesday my river sprung a leak after I poured in some Magic Water. It turns out that it got worse after I left it to try. Fortunately it didn’t all leak out and it doesn’t look too bad.

WP_20150121_17_38_22_Pro

No need to cry a river for me

One interesting side effect to the water level dropping so much is that the higher ground that I had intended to be underwater had a little of the resin stick around so it looks rather wet. From this picture you can also see that my end dams did not hold (the other side is actually a lot worse) which led to more drippings

WP_20150121_17_38_31_Pro

It’s water under the bridge

I’m really not looking forward to cleaning that stuff up, I’m planning on letting it sit and harden a few days under the theory that it might be easier to scrape off. Another small disappointment ended up being some glue that had run down into the river from gluing the rocks in and pooled in low spots. It wasn’t really that noticeable before I put water down but it kind of sticks out a bit now.

WP_20150121_17_38_45_Pro

Overall I’d say it turned out pretty well, sure the water is not perfect but it’s good enough and I learned some good stuff from it. Someday I may re-do it if I ever run out of projects. In the mean time I’m going to drop some feeders (just in case I use it for as a mini-module) and then ballast.

Drippings…

Trains

I poured some water for my bridge mini-mo this evening (first time I’ve done water). It went well until I heard a drip… then another drip… and so on.

It appears I missed two small holes in my somewhere in the river bed. I’m hoping the resin will start hardening enough to plug the hole before drought and famine strikes my little river. Also that dry water (raise your hand if you laughed a little at that like me) scrapes up from concrete easily. If things hold I’ll have some pictures tomorrow, if not I’ll come up with some water based puns 🙂

Static Grass Part 2

Trains

Jacob and I got a little time to work on “his bwidge” as he calls it, we finished up the grass and put down some rocks on the edge of the river (I’ll wait till the glue dries to post a picture of that). I let Jacob try his hand at static grass, he did pretty good!

WP_20150117_17_46_00_Pro

Once the glue dries on the rocks it’s basically down to water and then ballast. After that all that’s left is figuring out how I’m going to finish the benchwork if I do at all (I might just putty over the screw holes and call it good for now)

Static Grass

Trains

Tonight my little helper Jacob helped me do a quick test with static grass, I mentioned in an earlier post getting a Noch Static Grass kit.

WP_20141110_17_54_40_Pro

It was basically free to me (gift cards to Amazon) so I thought I’d give it a try. I had already done a ground test with Woodland Scenics grass on my mini-module so I decided to do a static grass test right next to it.

WP_20141130_18_41_52_Pro

The picture doesn’t really do the static grass justice but my helper wanted a picture. I’m definitely sold on the static grass, going to scrape off the ground foam stuff and get around to painting the river so I can get it all grassed up.

Misc Updates

Trains

I’ve had little time for trains lately for a number of reasons but the biggest is the arrival of this little guy.

WP_20141107_17_59_16_Pro

Baby David and his mother are doing well and I’ve been trying to explain trains to him but he hasn’t quite picked it up. Oh well, he’s only a couple days old 🙂

Before this guy showed up I did do a test on my bridge project, I tested a paint for dirt color. When I was at the hobby store looking at paints my middle child (Jacob) said this one looked like dirt and at the store I agreed. For my test I painted a section and sprinkled some woodland scenic grass on half of it.

WP_20141026_19_46_53_Pro

Looking up close in person I like the look with the grass but I’m afraid the where I didn’t do the grass looks too chocolately… now I’m not planning on doing any bare dirt sections and this would be right on a small river so it would likely be rich soil. I’m just not entirely sure yet. Maybe the better answer of the question will be how well I can transition it to the water line.

I’m also going to be experimenting with some static grass, I just had this arrive today

WP_20141110_17_54_40_Pro

I got this basically for free (Amazon gift cards), I’m not sure how exactly I’m going to this yet but I’ve wanted to try static grass and this way I’m not invested much if I don’t end up using it.

Module Changes

Trains

I’ve been pretty busy outside of the train room lately, and some of those projects are starting to wrap up so I’ve been able to get a little work done. My youngest has been fun helping me work on my trestle project.

WP_20140902_16_11_01_Pro

His contribution is mostly watching and seeing if Percy will fit (it’s one of the metal take and play Percy toys).

WP_20140912_16_38_39_Pro

All I’ve done so far is use some plaster cloth to start building the land form, I still need to put down ties and spikes down on the bridge and the right side of the bridge. I also posed a small solder train using my DMIR car shop flat scratch built model (don’t look too close, the switcher doesn’t have couplers).

The bigger news is I’ve decided to redesign and start over on my free-mo modules. The problem is my original plan doesn’t really inspire me anymore and I wasn’t terribly happy with the track work. I also wanted to start a project that I could use to really dive into hand laying track and was less straight.

Free-mo Redo idea

Operationally it’s basically what I have now but more spread out. For bench work I’ll be reusing the three 2’x4′ sections I already have now just in an L configuration. The top left and right are free-mo ends straight through (8 feet long), the curve off goes to the cement plant I had already built. The fancy track on the top left is a 30 degree crossing with a transition leg from the main. The main purpose of this track is more stylistic not functional. My plan is to try and hand lay both the cross over and turnouts, as well as do a little bit more with non-flat scenery.

Trestle Supports

Trains

Last night I managed to get a bit over overdue work, some trestle supports. When I originally built the framework I had no idea how I was going to build the trestle or how tall it is so I didn’t do anything to support the trestle at all. Ever since I got the trestle built I’ve been meaning to get something built so I finally did it.

WP_20140506_18_50_44_Pro

WP_20140506_18_50_54_Pro

It’s probably overkill but better safe than sorry. After getting this done I was looking over my posts related to this project and realized I had started this project in December of 2011! That was when I built the main framing of it. The next update to the project was December 2013. That’s crazy, and not even my longest running project. It was a bit of a wakeup call, that I need to make sure I do something. Otherwise I’m just wasting money on projects I’ll never work on. Fortunately this is a fairly small project that has lent itself to a bit of work at a time when time allows. The next task on this one is to build up the landforms with cardboard and plaster cloth then I’ll get back to spiking.

Hand Laid Track Attempt – Part II

Trains

I took a little time in the train room this evening, I glued some more ties on the other side of the trestle and started spiking some rail down on the dry side. As I mentioned in the last post this is my first time spiking track, it took me a bit to figure out the best way to get started. Since this is a straight section I figured out where I wanted the one rail, spiked a few ties to get a firm mount and then used my 3 point gauge to position the other rail and start spiking it down.

A few misplaced spikes and a damaged tie or two and I got a decent start

WP_20140505_19_01_15_Pro

It feels a bit tight on the left but it fits the gauge and I ran a wheelset over it (probably doesn’t help that the right side isn’t spiked down). It will probably be something I’ll need to revisit later.

The best part so far has been the modeling time I’ve gotten out of it for just a few dollars in supplies, and it’s almost all been things that I can do a small amount at a time when I have free time. In other words doing something when I’ve got a little time rather than doing nothing because I don’t have a lot of time.

Update: A couple more pictures. I was able to get some more spiking in. I got the once side completely spiked and got a couple spikes started on the other.

Overall view

Overall view

Close up of spikes

Close up of spikes